

Virtualizing Your Forensics Lab in the Cloud Part 4: Securing Your Evidence in AWS
Hello everyone! Jamie McQuaid here, Technical Forensics Consultant with Magnet Forensics, and lately I’ve been spending a lot of time thinking about—and implementing—innovative ways to conduct investigations in the cloud and using cloud technology.
In the fourth part of this cloud blog series, I want to share with you some of the ways that you can be thinking about securing your evidence in AWS (in part 5 of the series, I’ll go over the same techniques you can apply if you’re using Azure). If you’re holding back on moving your forensics lab to the cloud because you think once the data is there, it’s not as secure as it may be elsewhere, I’m here to quell some of those concerns.
Getting Started
Whether you’re collecting evidence from the cloud or storing it there for analysis, considerations and steps should be taken to ensure that data is secured and only accessible to those who need it. We, as examiners, do this for evidence whether it’s in your lab physically, somewhere else in your organization, or virtually in the cloud.
How do we secure our evidence so that it’s integrity can be evaluated and confirmed regardless of how it’s stored? There are lots of methods but the primary way to secure something is to limit access. We do this today with proper evidence handling and storage requirements and we track that access with chain of custody. A chain of custody at the most basic level tracks everyone who’s touched the evidence from the moment it is seized to the moment it gets presented in court (and then either returned to the owner or destroyed). Well, we can do these same things if our data is stored in the cloud, we limit access to it and have an audit trail of everyone who has accessed it.
Restricting Access using Access Controls in AWS
Just like you most likely do in your lab, you need to restrict access to your evidence in the cloud. Luckily most cloud providers have very robust security access controls at your disposal for this exact purpose. So, let’s take a look at ways we can secure that data in various states:
Evidence at Rest – AWS S3
The most common way to store data in AWS is through S3 object storage or buckets. There are several ways to secure and control access to an S3 bucket in AWS but the two primary ways are through IAM policies and bucket policies and they function just as you think they would.
IAM policies are applied to a user, group, or role while bucket policies are applied specifically to the storage bucket itself. IAM policies come in 3 forms:
- AWS Managed – Created and maintained by AWS
- Customer Managed – Custom created and maintained by you
- Inline – Specifically applied for individuals and single use cases
There are enough AWS managed policies that should satisfy most situations but if you want to get a little more granular with your permissions for certain circumstances, you’ll want to create a customer managed one. The IAM policies dictate what the user/group/role can access or do.
Bucket policies apply to the buckets themselves and dictate who or what has access to them. They’re helpful if you want to further restrict access to a particular subset of buckets within an account. If you want to restrict access at the object or file level within a bucket (e.g. Alice has access to bucket A but not file1, file2, or file3), you’ll need to use bucket ACLs. Where bucket policies control who can access the bucket, ACLs control access at the object level. Bucket ACLs aren’t used quite as much anymore but, in my opinion, they’re still the best way to control access to individual objects within a bucket.
EC2 Instances & EBS Volumes
To process or analyze anything, you’ll likely want to move the data from object storage to something that has computing capacity. A lot of the same access controls and security measures mentioned above still apply but there are a few other considerations you might want to consider while analyzing your data.
- Restrict Access – Use the same IAM roles/policies as above to restrict access to your instances as well as what the instance can access.
- Dedicated vs Shared Hardware – AWS allows you to run your instances on dedicated hardware, however that comes at a cost. The shared infrastructure is always segregated and scrubbed before it gets used by another user but if you want the extra layer of separation, dedicated hardware might be an option for you.
- Clean up & shutdown – If you need to preserve or save your case data, you can either save the case back out to S3 or save the entire EBS volume as a snapshot prior to terminating it.
Encryption
Encryption is likely the first thing you think of when you want to secure your data anywhere and AWS has many options for encrypting your data at rest for both S3 and EBS. By default, neither are encrypted but you can turn on encryption when either a bucket or EBS volume is created, or apply encryption to the storage after it’s been created (for EBS it’s a little more complicated where you need to take a snapshot of a volume, encrypt it and use the new snapshot but it’s fairly easy to do).
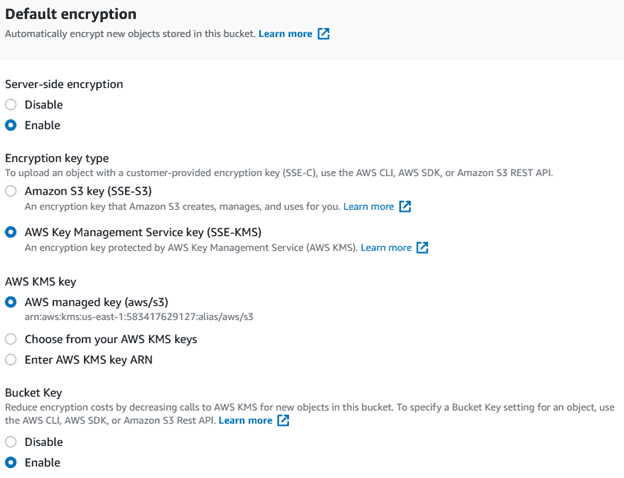
The biggest question when it comes to AWS encryption is whether you trust Amazon to manage the encryption for you or if you want to manage it all yourself. It’s definitely a lot easier to let AWS manage your keys but you can certainly import your own Customer Managed Keys (CMK) via the AWS Key Management Service (KMS) as well. This post won’t dive into the various options for CMK (there’s a lot of them) and deserves its own post but the summary is: AWS managed encryption is good but as we deal with very sensitive information, you’ll probably want to look into using CMK for your actual evidence storage.
Personally, I’ll use AWS managed keys for anything other than evidence and case data, but CMK might be required for any sort of lab certification. The downside is, you’ll need to manually rotate your keys and if you lose the keys, AWS can do very little to help you.
Tracking Access with Audit Logs
Once we’ve secured our data and restricted access to it, how do we know nobody else accessed it? If we set up our access controls above correctly then only those authorized accessed it, but how do you prove it? Cloud providers have very robust logging features and functionality that goes far beyond any chain of custody form and can complement an existing custody tracking to ensure that access has been restricted.
CloudTrail in AWS
In AWS, CloudTrail logs all access to your data either via the console, CLI, or SDK. Logging, saving, and analyzing CloudTrail logs can be a very valuable skill to have in any cloud activity but especially important in demonstrating the integrity of your evidence. Best practices include:
- Centralize logging – Copy those logs to another account that only a few people have access to
- Integrity checks – When copying logs, you can enable integrity checks for those logs to ensure they haven’t been tampered with
- Automatic notifications – Set up notifications for any time the logs or the evidence are being accessed by another user or used in a way that goes against your desired purpose.
Cloud trail logs the following:
- Identity of API caller
- Time of the API call
- Source IP
- Request parameters
- Response
- Additional metadata
CloudTrail is an excellent tool in order to monitor access to your AWS resources however one area that it typically won’t cover is direct access or connections to your EC2 instances. If you’ve left your instances open to the public either via SSH or RDP, you’ll also want to ensure you have some sort of access logging enabled for that as well as that would be considered outside access and not detected by CloudTrail (even better avoid allowing direct public access to your instances all together to avoid this). In this case, Event logs for Windows or similar artifacts can help determine access to a given instance if it was accidentally exposed.
Overall, using the cloud to improve our investigative capabilities is a major win for teams who might not have a budget for a full lab or has limited storage and computing power. Even if you have a decent lab, there is certainly many benefits to enhance your lab’s capabilities. As long as you take the time to understand how it can be used and secure your evidence just like you would secure it in your physical lab, it can be a very valuable addition to your toolkit. Securing data starts with access controls and auditing allows us to ensure the confidentiality and integrity are maintained throughout the investigative process.
Jamie McQuaid is a Technical Forensics Consultant with Magnet Forensics with over a decade of experience in corporate investigations and helps advise Magnet and their customers on cloud security best practices and find innovative ways to conduct investigations in the cloud and using cloud technology.
Follow Jamie McQuaid on Twitter (@reccetech) to see what he’s up to and catch up with him!
Further Reading
- Part 1: Leveraging IaaS for Your Lab
- Part 2: Benefits of Virtualizing Your Forensics Lab
- Part 3: Let’s Get Practical
- Part 5: Securing Your Evidence in Microsoft Azure
- A Practical Guide to Virtualizing Your Forensics Workstation: Setting Up an Amazon EC2 Instance for AXIOM Cyber
Technical Advice Disclaimer
Magnet Forensics is dedicated to engaging with the DFIR community through our blogs and whitepapers. However, properly addressing technological issues often includes numerous variables that require independent assessment and strategies designed for each specific circumstance. Since Magnet Forensics cannot have complete insight into all variables involved in a specific situation, this blog/whitepaper is for informational purposes and should not be read as professional advice recommending techniques or technologies to address your specific situation. We do not accept responsibility for any omission, error, or inaccuracy in this blog/whitepaper or any action taken in reliance thereon.