

Creating Export Templates in Magnet AXIOM
Hi! Jessica Hyde here to share a bit with you about creating Export Templates in Magnet AXIOM. If you are curious about learning about all the new reporting features we’ve recently added to AXIOM, you can check out this blog post and this video.
Create Templates
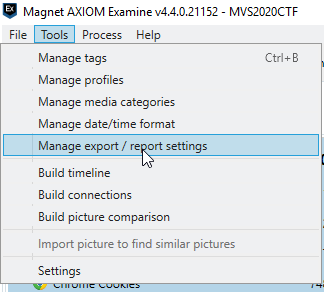
To create a custom export template in AXIOM, first go to Tools menu in the upper left of AXIOM Examine and select Manage export / report settings.
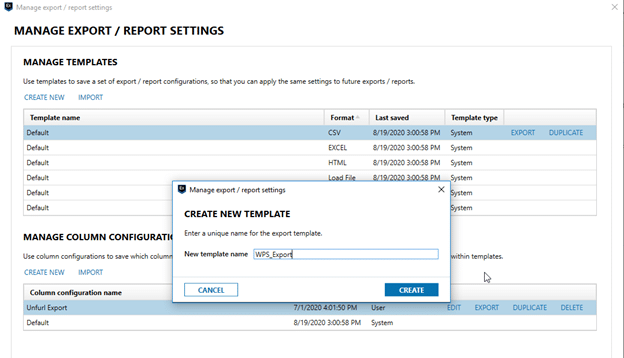
Next you will want to create a new report and name it. In my instance, I wanted to create an export for examiners to use to export URLs for use with MAGNET Web Page Saver, as mentioned in the Using MAGNET Web Page Saver blog. I am calling this WPS_Export.
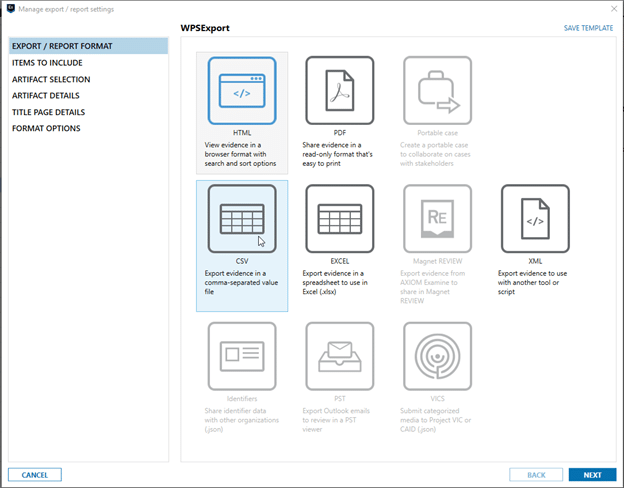
You will then be brought to a screen where you can select the type of report. As mentioned, we want to create a CSV export.
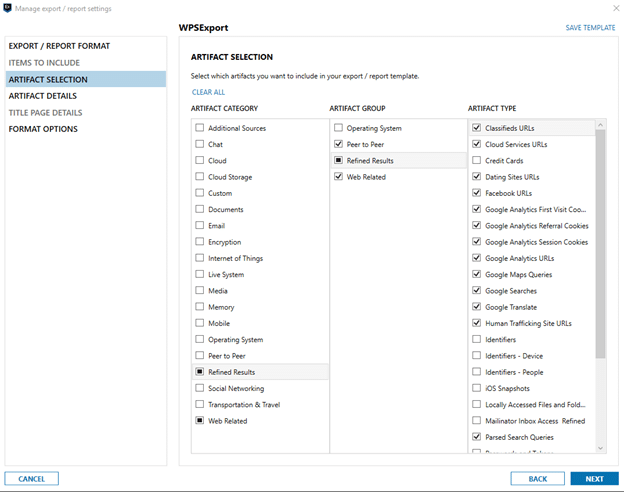
Next, we can select our Artifact categories. In this instance, I am concerned with Refined Results and Web Related because I am creating an export for use with WPS. So, we will deselect each of the other artifacts, and then deselect artifacts that do not contain URLs.
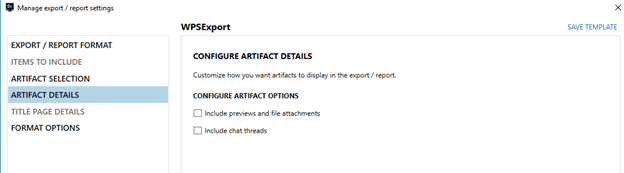
On the next screen we can decide if we want to include attachments alongside the CSV. In this instance, I do not want them so I will uncheck both the previews and file attachments as well as the chat threads.
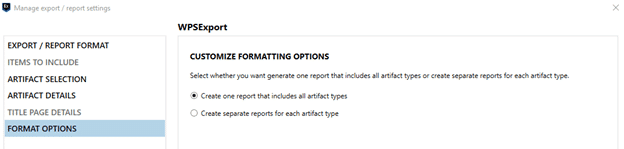
The final screen allows us to select if we will create one report that includes all artifact types or separate reports for each artifact type. In this instance, I am creating this export for ingestion into Magnet WPS, so I will select one report that includes all artifact types.
Now you have completed your report and you can click Save Template. Your template is now ready to for export, duplication, or further editing. If you export, you can share the resulting JSON with your colleagues or others.
The template I created resides here.
Custom Column Configurations
In addition to creating templates, you can also create different column configurations for columns you wish to include and the order in which you wish to display them. You can mix and match saved column configurations with different templates.
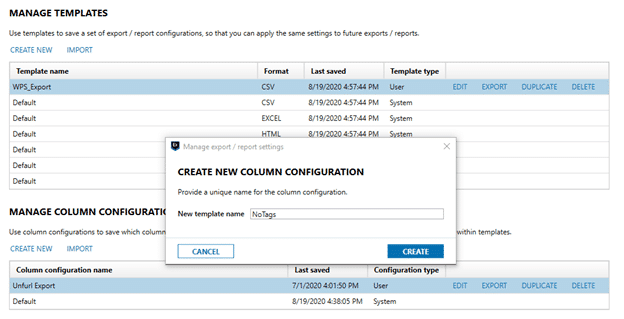
This time select CREATE NEW under the MANAGE COLUMN CONFIGURATION heading and name the template.
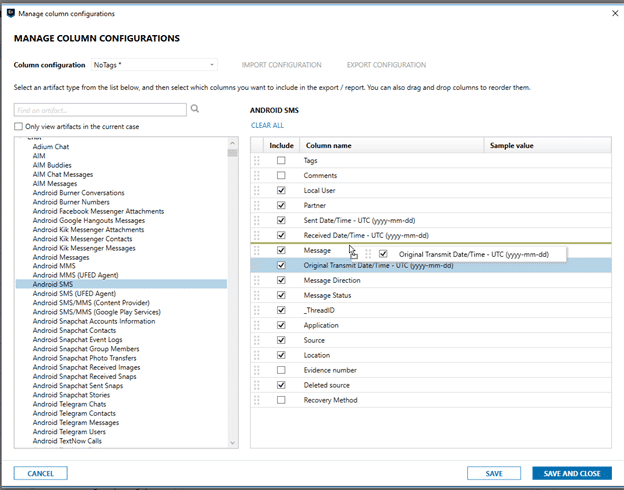
You will now have the option to include, exclude, and move columns as necessary for each column for every artifact. You can search for a specific artifact to edit, view only the artifacts in the current case, or edit each artifact individually—all changes are done in this screen, including reordering of columns as shown below by selecting the dots to the left of the column name and dragging the column to the desired location in the order. Once you are done, click Save and you will be able to export, edit, and duplicate the column configuration just as you did with the template.
Templates can be used to create exports for data ingestion into other tools like Web Page Saver as well as to have common reporting standards for your organization. The ability to have multiple templates allows for the use of different templates for different stakeholders.
I hope this helps with creating custom exports and templates for your organization! If you have any questions or comments, feel free to email me at jessica.hyde@magnetforensics.com.