
Preparing Office 365 for Use with AXIOM Cloud
In this blog, Timothy Moniot, a Senior Solutions Consultant here at Magnet Forensics, guides you through how to get Microsoft Office 365 ready to use in Magnet AXIOM.
Getting Microsoft Office 365 prepared and setup to be used in conjunction with AXIOM Cloud will require cooperation between investigative and IT personnel within an organization.
- Create and setup at least one account for investigators that have Administrative level access to the O365 environment.
- Assign this account(s) with permissions, via ‘Roles’ that have Audit Log access, as you will surely want to collect the O365 logs; they contain a wealth of relevant data.
- Assign the investigator account(s) ‘read’ access to the subject mailboxes under investigation.
- a. Some IT personnel believe that Administrative accounts come with this mailbox ‘read’ access by default, but this is not the case. “Read” access must be explicitly given for each subject account needing to be collected.
i. Some organizations opt to provide this “read” access for accounts on an as-needed basis and for only those accounts under investigation. This option will require investigators to contact IT to explicitly request this read access every time there is an investigation on specific accounts.
ii. Others elect to provide “read” access to all mailboxes within the environment, upfront, for the investigator collection accounts, so they have this access to all accounts moving forward for any investigation that might come forward. This option will make it easier for investigators to quickly and easily collect subject mailboxes whenever the need arises without having to directly contact IT every time.
Administrative Account Creation Workflow in Microsoft O365 Admin Center
Have IT use their privileged Domain Admin account to log in to the Microsoft O365 Admin Center to create the investigative collection account(s) needed. Ensure that the investigative collection accounts are Administrator accounts. IT is free to decide whatever security restrictions and in a manner they see fit for organizational purposes. As noted above, points 2 and 3 are required in this setup.
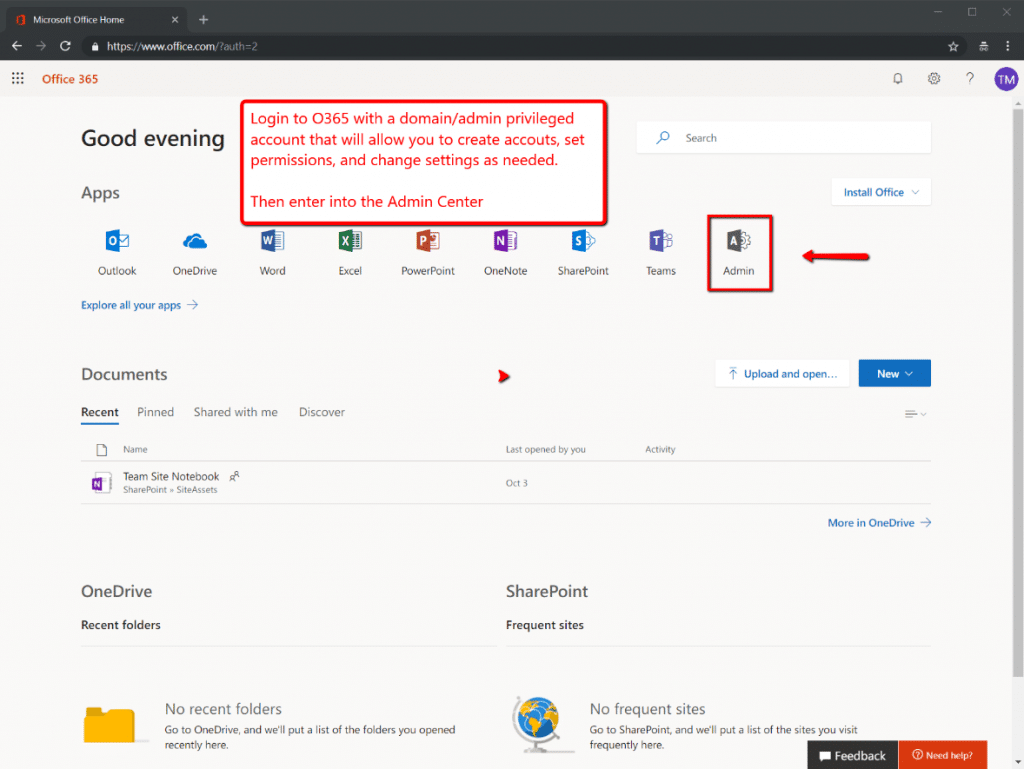
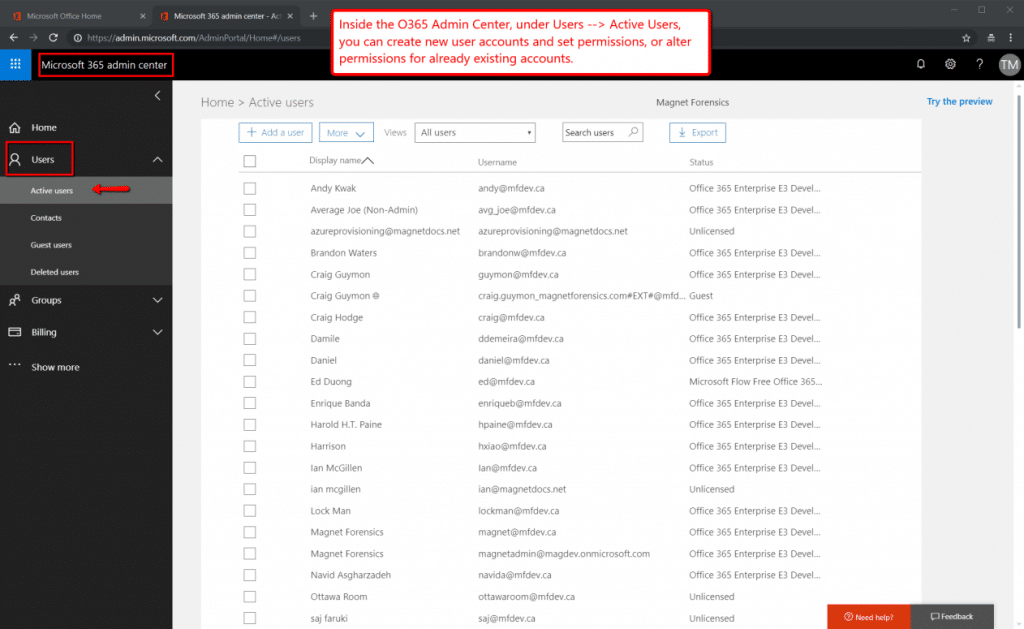
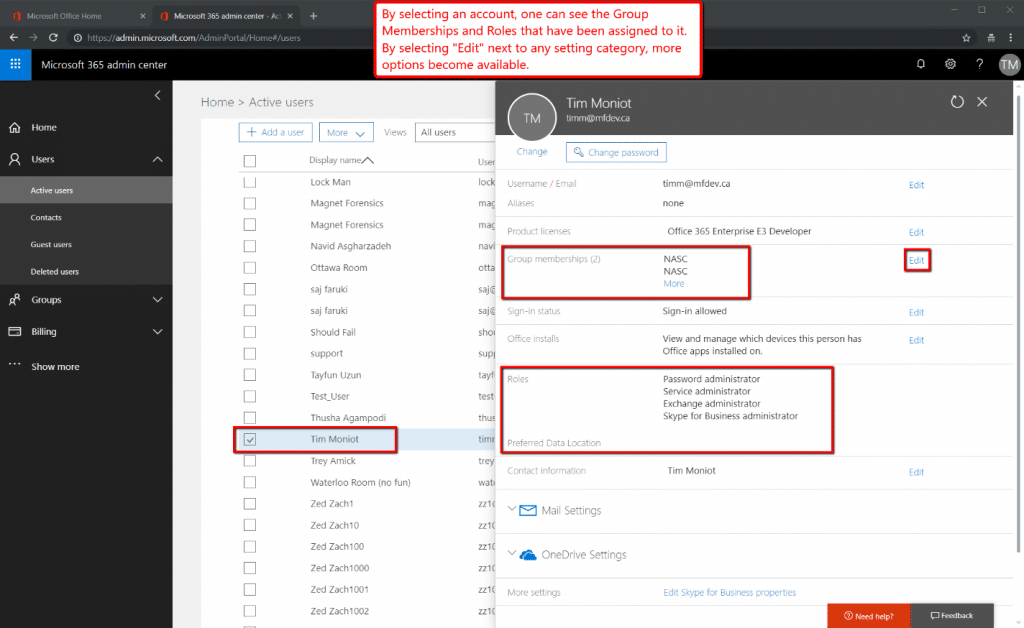
Figures 1 through 3 below, outline how to access the O365 Admin Center, list user accounts, and review group memberships and Roles. Figure 3 is especially important because it will show the assigned Roles, which relate back to the settings that control access to the Audit Logs. Group memberships can also be important, as IT might find it useful to administer the investigator accounts they are about to create, as a group.
Audit Log Role Assignment in Exchange Admin Center
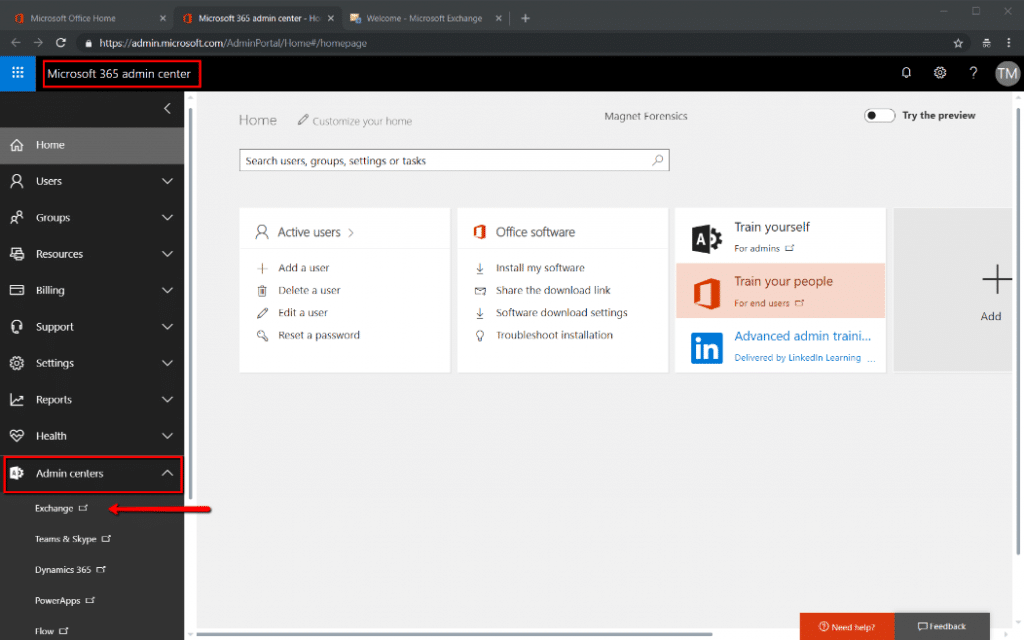
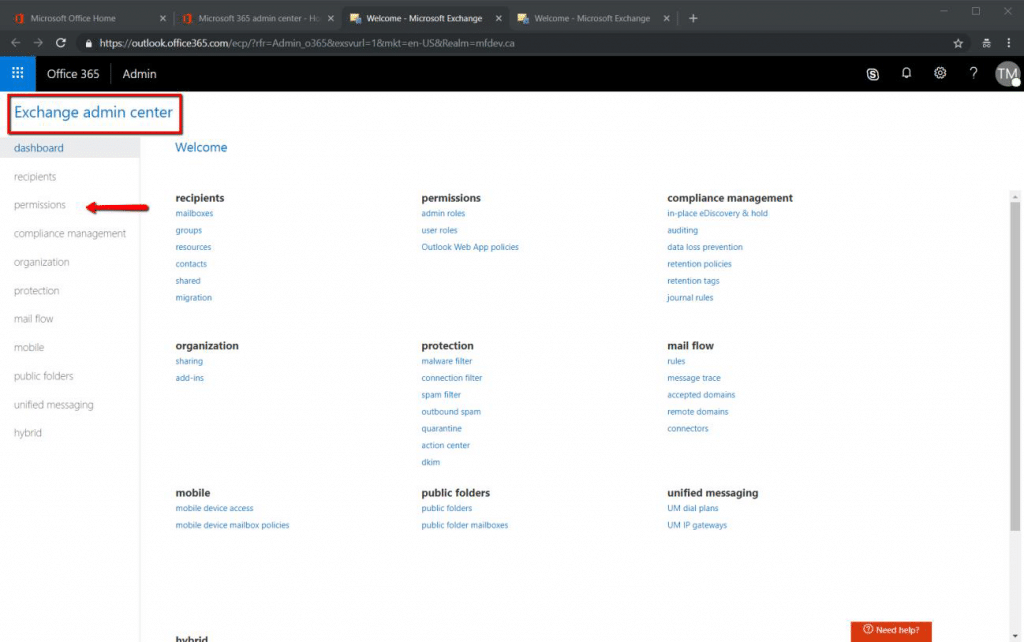
IT will need to leave the Microsoft O365 Admin Center and make changes in the Exchange Admin Center; a distinctly different area. This can be accomplished inside the preceding O365 Admin Center by choosing Admin Centers → Exchange, as outlined in Figure 4 below.
You should now find yourself inside of the O365 Exchange Admin Center. Now choose ‘Permissions’. This is where you will assign the Audit Log access permissions, via ‘Roles’ for the investigator collection Admin accounts. See Figure 5 below.
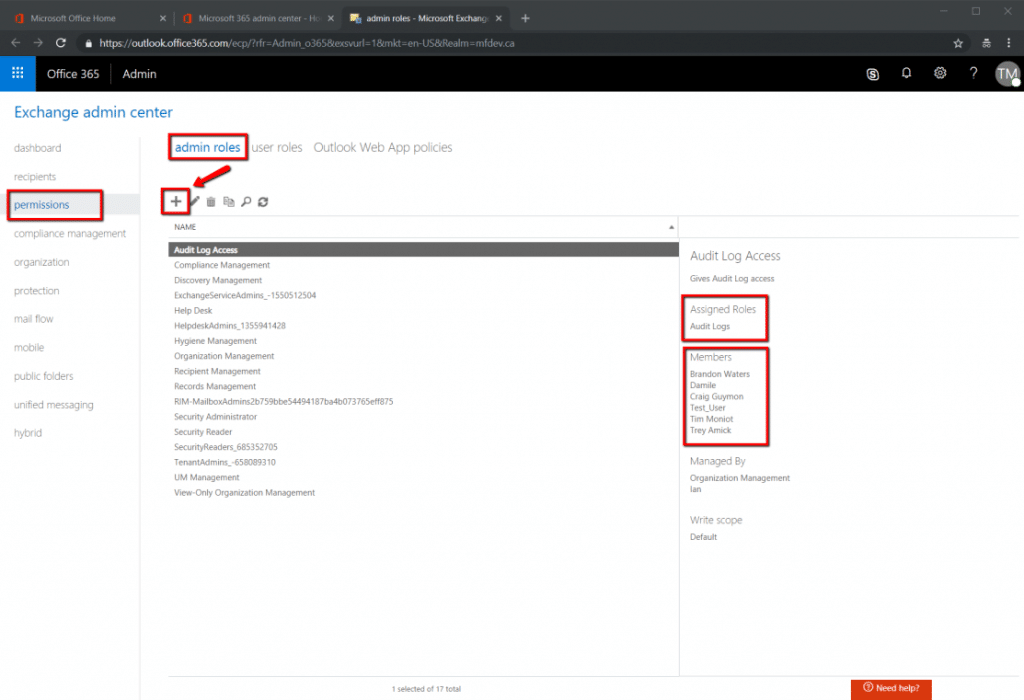
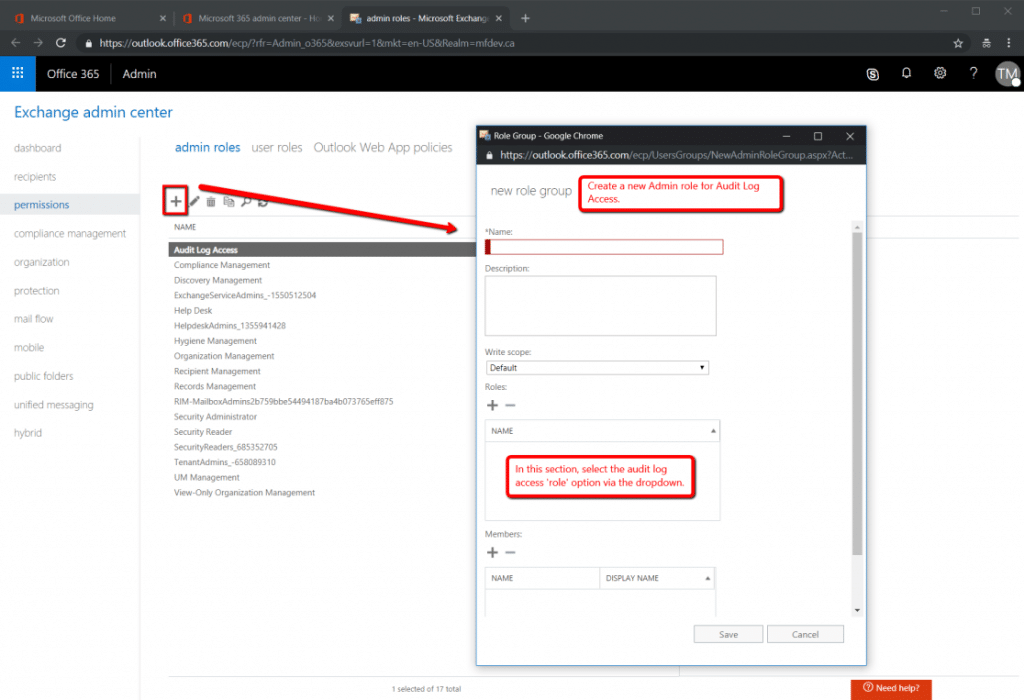
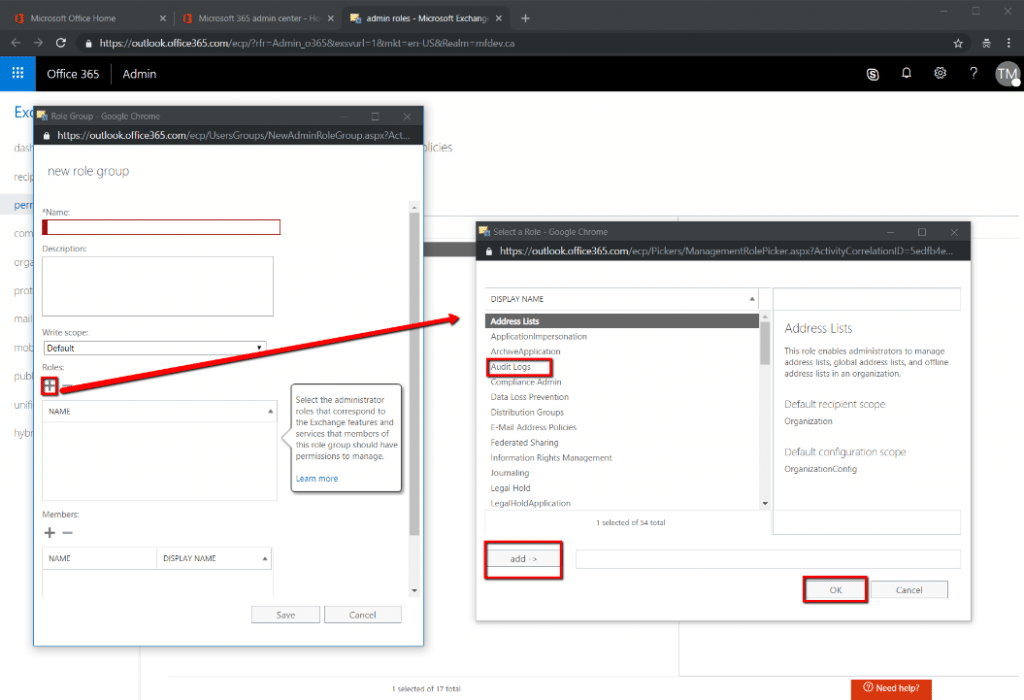
Audit Log access is now ready to be assigned as an Admin Role permission. This can be accomplished by editing an already created role and adding Audit Log access to it or by creating a completely new role and giving that role Audit Log access. In either event, ensure that the Admin investigator collection accounts are added as ‘Members’ to that role.
In the example listed in Figure 6 below, a new ‘Role’ named “Audit Log Access” was created, it was given the permission of audit log access, and accounts were assigned to it as ‘Members’.
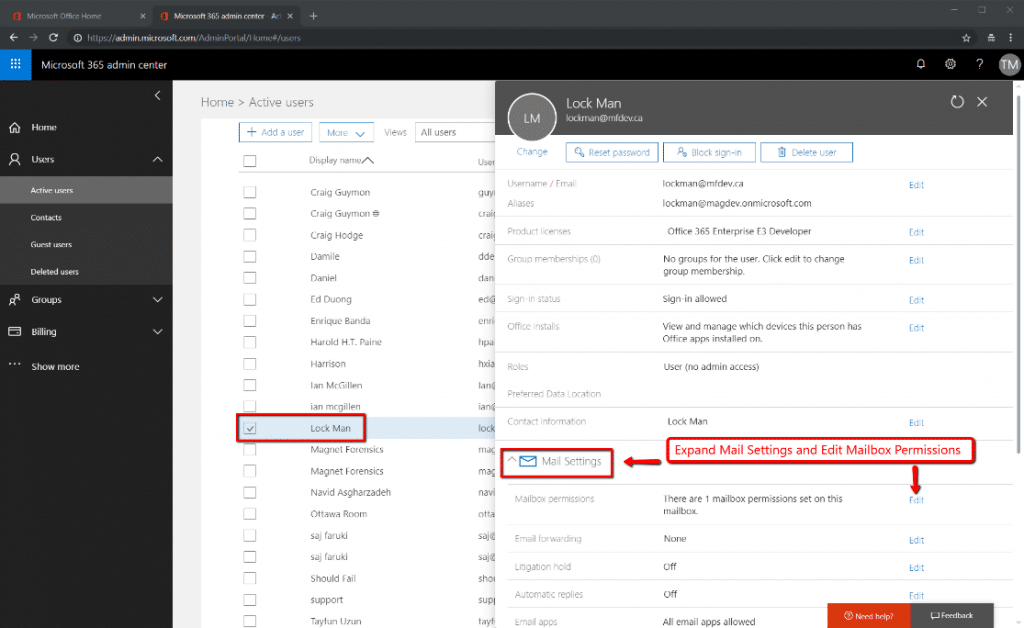
Lastly, you will need to give the Admin investigator accounts “read” access to the subject mailboxes under investigation. There are two methods by which this can be accomplished: via the Office365 Admin Center GUI or by command line. We will outline the GUI method below.
To accomplish this, go back to the O365 Admin Center. As shown in Figure 9 below, proceed to Users → Active Users and expand ‘Mail Settings’. Under ‘Mailbox Permissions’, select Edit.
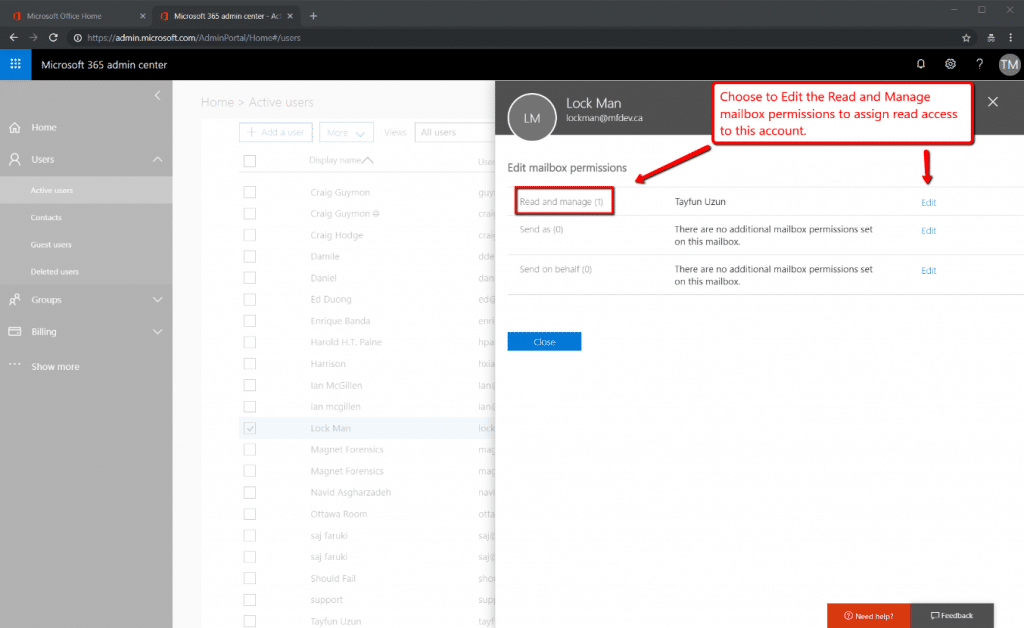
Under ‘Read and Manage” choose to Edit and then add the Admin investigative collection accounts. This will give those investigative collection accounts the read access they need to the subject mailboxes so they can collect the data with Magnet AXIOM Cloud. Figure 10 specifically shows that the Lock Man mailbox has been selected as an account under investigation, and that Tayfun Uzun has been given access to ‘read’ it.
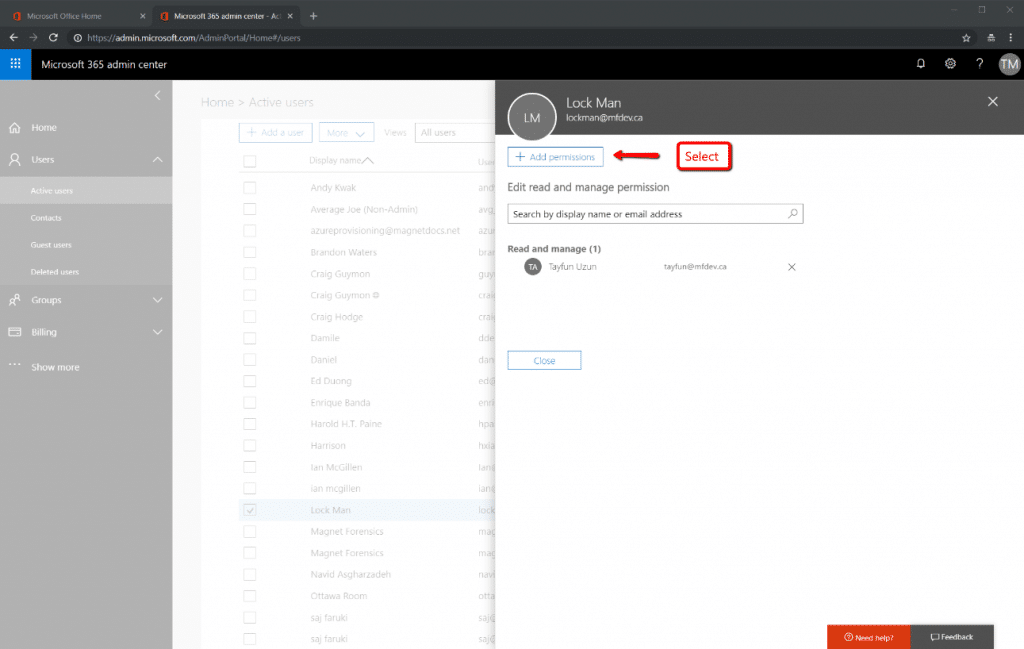
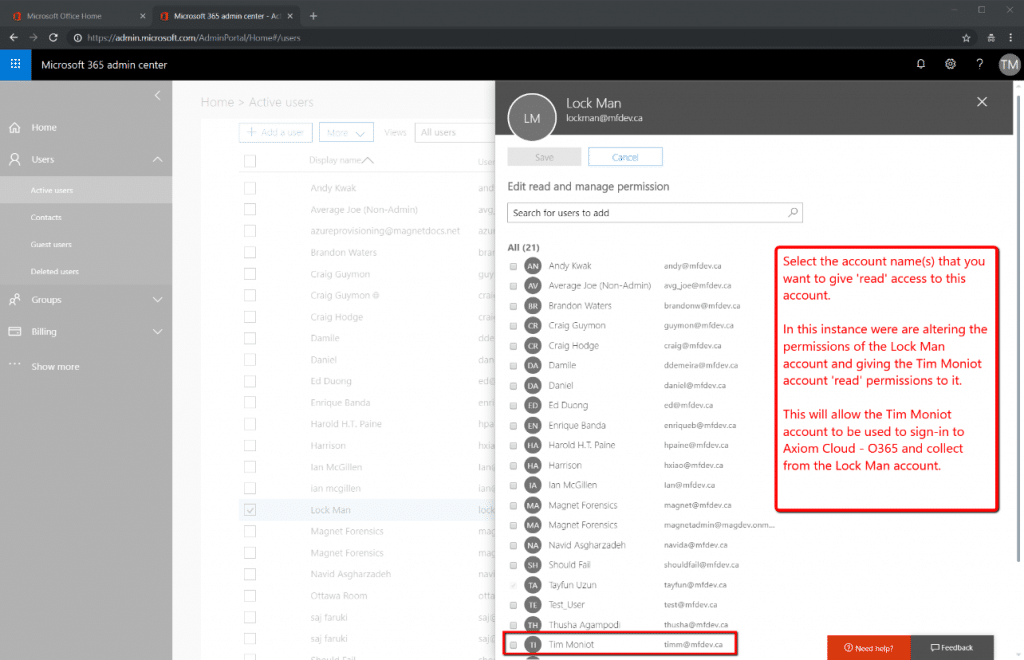
Figure 11 shows that another investigative collection account can be added to also read from this same Lock Man account, if needed. More than one investigative account can be added to read from a subject mailbox is the situation requires it.
Should one like to assign ‘read’ permissions to multiple subject mailboxes all at one time, consider using PowerShell.
The Admin investigative collection accounts are now be ready to collect from and investigate subject mailboxes within your organization.